
Sharepoint Integration
Generate ClientID and SecretKey which never expires
Create a Sharepoint App
Step 1 : Register the Add-In
- Log in with an admin account on the parent site, and then go to the following URL: https://sitename.sharepoint.com/sites/subsitename/_layouts/15/appregnew.aspx
-
For sites: Replace the
<sitename>in the above URL with your site name.
For example, if your SharePoint site is https://abcd.sharepoint.com, then replace the<sitename>with udialog. -
For subsites: To add subsites, append your subsite name to the site URL.
For example, if your subsite URL is of the form: https://udialog.sharepoint.com/sites/CloudToolzTesting, then the above URL is https://udialog.sharepoint.com/sites/CloudToolzTesting/_layouts/15/appregnew.aspx
- Enter the following information on the page that is displayed when you first visit the URL.

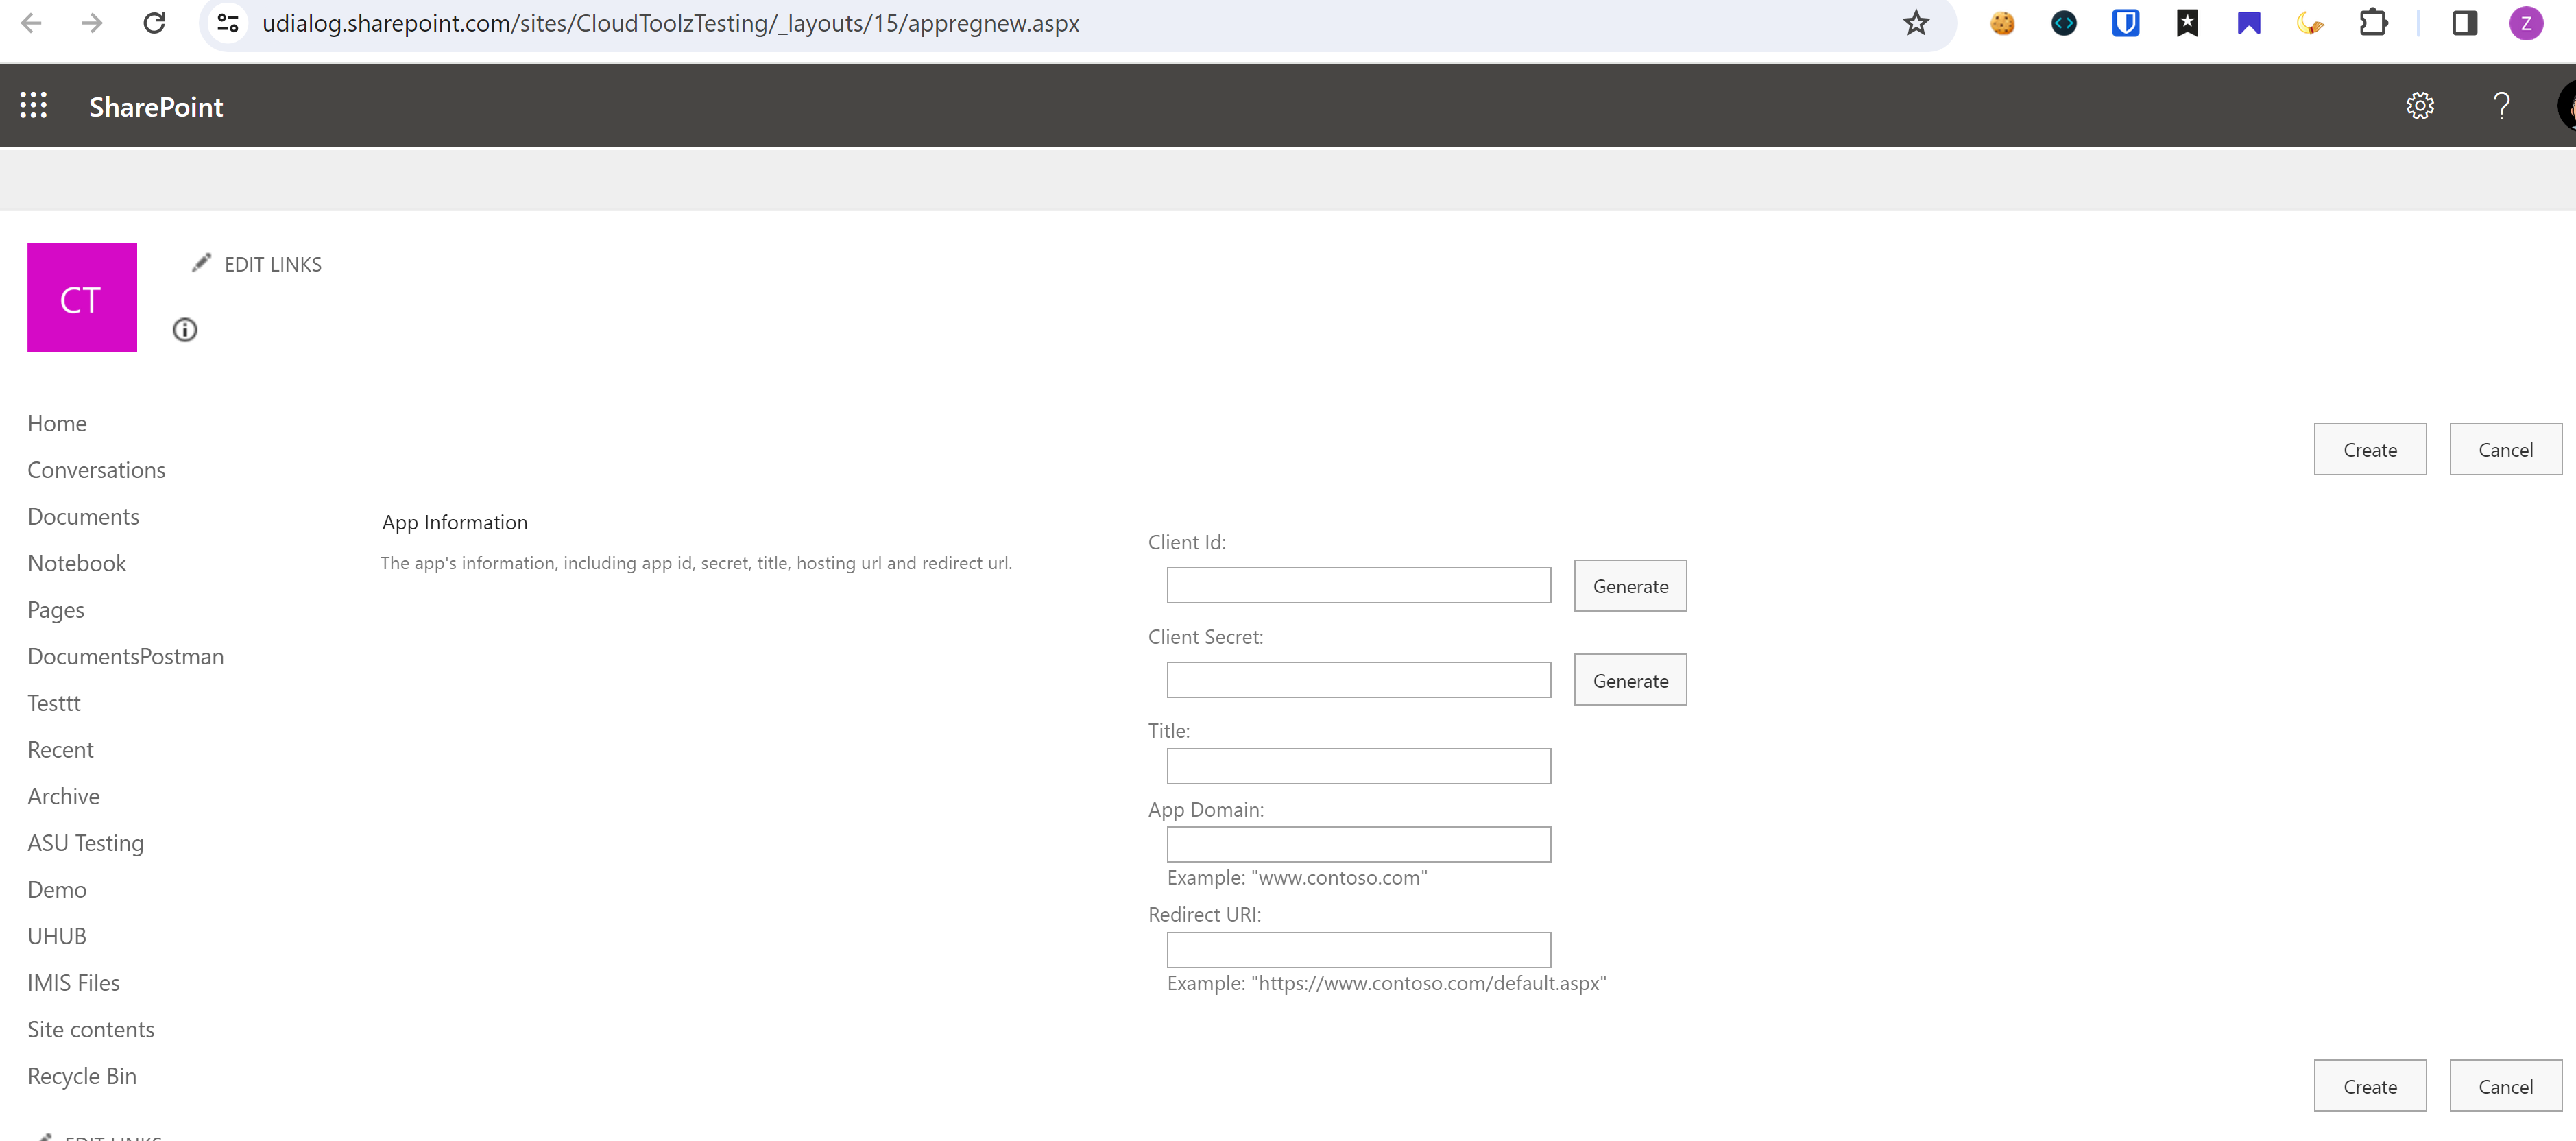
- In the App Information section, click the Generate button next to the Client Id and Client Secret text boxes to generate the respective values.
- In the Title textbox, enter the Add-In.
- In the App Domain text box, enter the localhost.
- In the Redirect URL text box, enter https://localhost
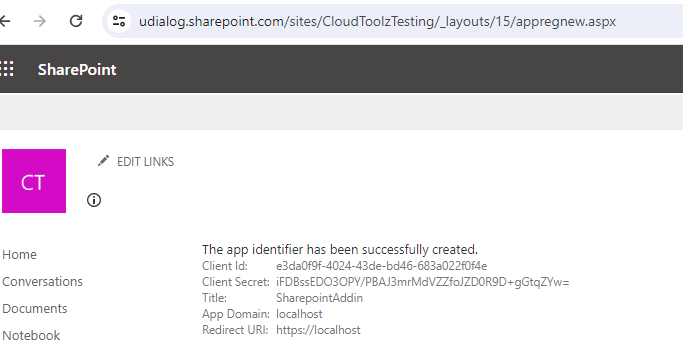
- Click Create. The Add-in is registered, and the following message is displayed.

Step 2: Grant Permissions for the Add-in
Once the Add-In is registered, the next step is to set the permissions for that add-in to access the SharePoint data.
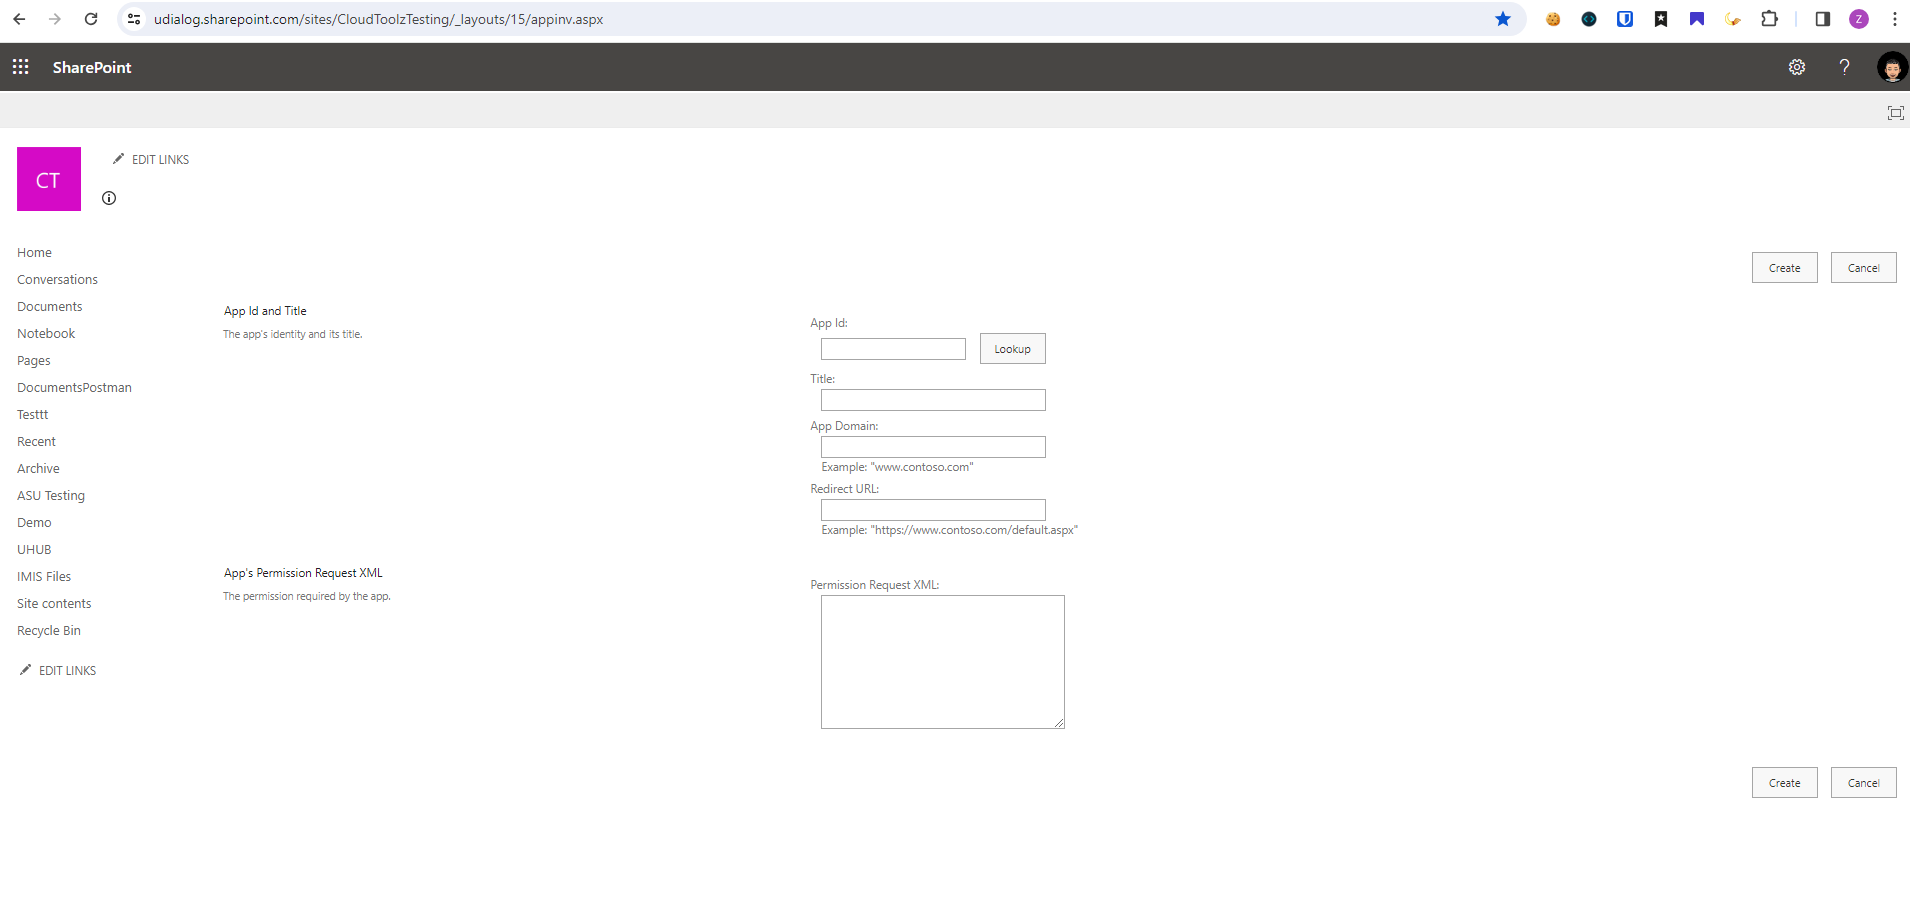
- Go to the following URL in the browser.
-
For sites: Replace the
<sitename>in the above URL with your site name.
For example, if your SharePoint site is https://udialog.sharepoint.com, then replace the<sitename>with udialog. -
For subsites: To add subsites, append your subsite name to the site URL.
For example, if your subsite URL is of the form: https://udialog.sharepoint.com/sites/CloudToolzTesting, then the above URL is https://udialog.sharepoint.com/sites/CloudToolzTesting/_layouts/15/appinv.aspx
This redirects to the Grant permission page.
-
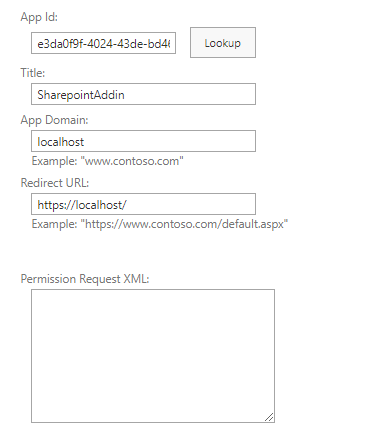
- Enter the Client ID (which you have generated earlier) in the App Id textbox, and click the Lookup button.
-

- In the App's Permission Request XML section, enter the following permission request in XML format.
-
<AppPermissionRequests AllowAppOnlyPolicy="true"> <AppPermissionRequest Scope="http://sharepoint/content/sitecollection/web" Right="FullControl"/> </AppPermissionRequests> - Click Create.
- Click Trust It to trust the add-in to read items from your website.
Note: The Client ID (or App ID) and client secret registered through SharePoint Online’s /_layouts/15/AppRegNew.aspx has a validity of 1 year.
Extend the validity of the App
Here are the steps to execute a PowerShell script to extend the validity of a given app's client secret by 100 years::
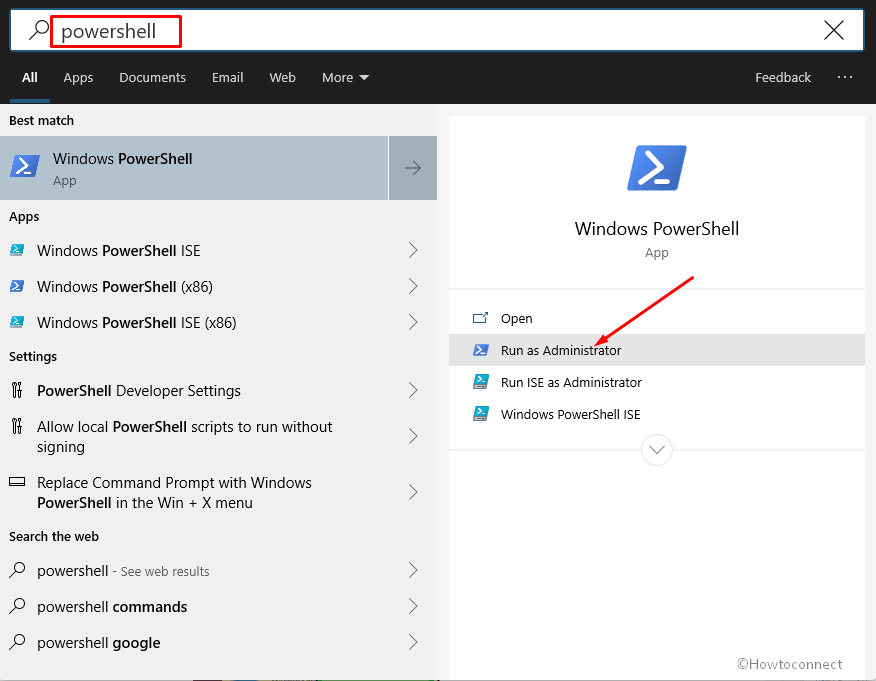
Step 1: Open Windows PowerShell as administrator:
Step 2: Put the script from below and press Enter:
Note: Please paste your current SharePoint Client ID and secret key ($ClientID, $ClientSecret) (which you have generated earlier) to the script.
if (!(Get-Module AzureAD))
{
  try
  {
    Install-Module AzureAD -Confirm:$false -Force -ErrorAction Stop
    import-module AzureAD
  }
  catch
  {
    $Error[0]
  }
}

# Parameters
$ClientID = "6b78b55e-b8bf-4303-90ae-5c50efe14b94"
$ClientSecret= "NT38Q~vlknvnYk9H._8JcQ4mgsczaqpvWWj7yda0"

# Connect to AzureAD
Connect-AzureAD

# Get the Client ID
$App = Get-AzureADServicePrincipal -All $true | Where-Object {$_.AppID -eq $ClientID}

# Get the Current Expiry Date
$CurrentExpiryDate = (Get-AzureADServicePrincipalPasswordCredential -ObjectId $App.ObjectId).EndDate
Write-host "Current Expiry Date:" $CurrentExpiryDate -BackgroundColor Green

# Extend the validity of the App by 100 years
$StartDate = Get-Date
$EndDate = $StartDate.AddYears(100)
New-AzureADServicePrincipalPasswordCredential -ObjectId $App.ObjectId -StartDate $StartDate -EndDate $EndDate -Value $ClientSecret
New-AzureADServicePrincipalKeyCredential -ObjectId $App.ObjectId -StartDate $StartDate -EndDate $EndDate -Value $ClientSecret

# Get the New Expiry Date
$CurrentExpiryDate = (Get-AzureADServicePrincipalPasswordCredential -ObjectId $App.ObjectId).EndDate
Write-host "New Expiry Date:" $CurrentExpiryDate -BackgroundColor Green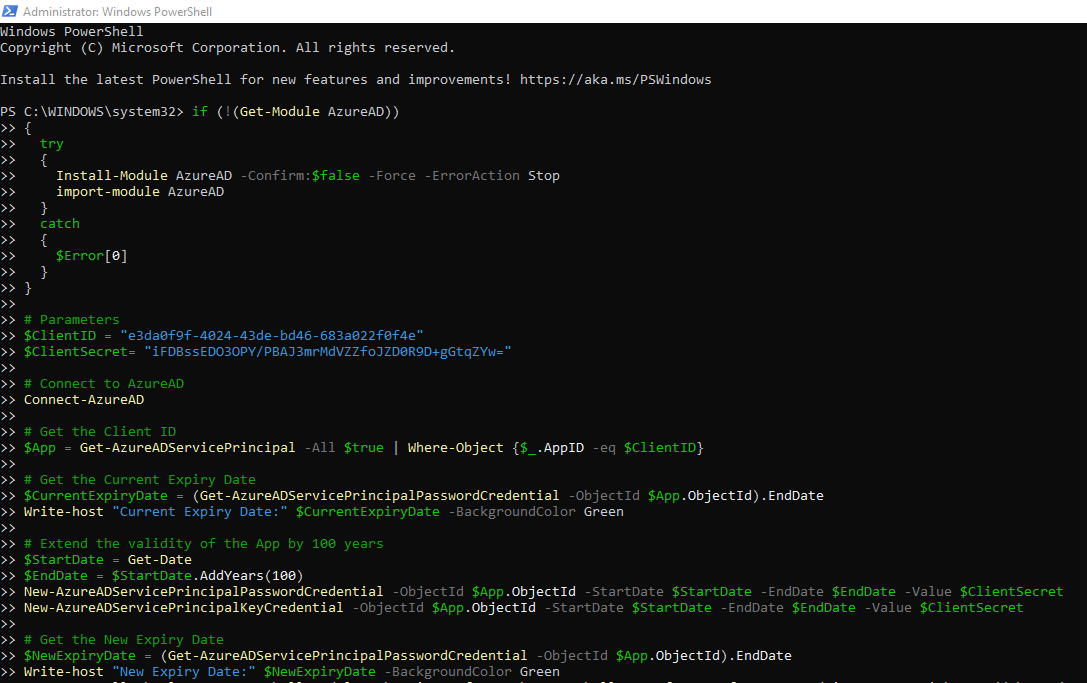
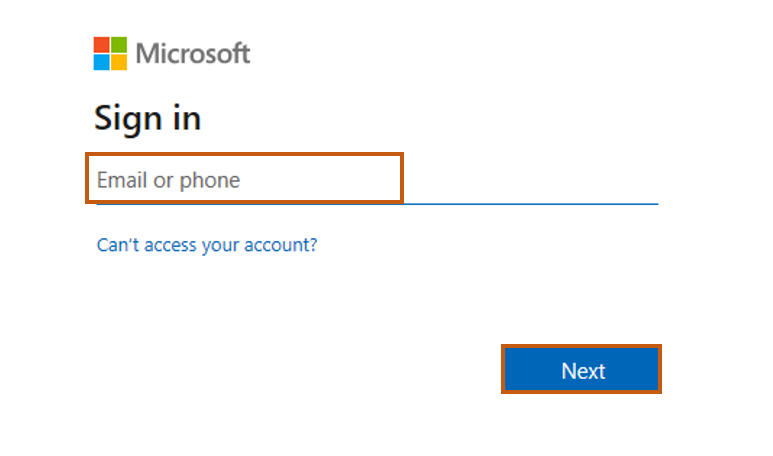
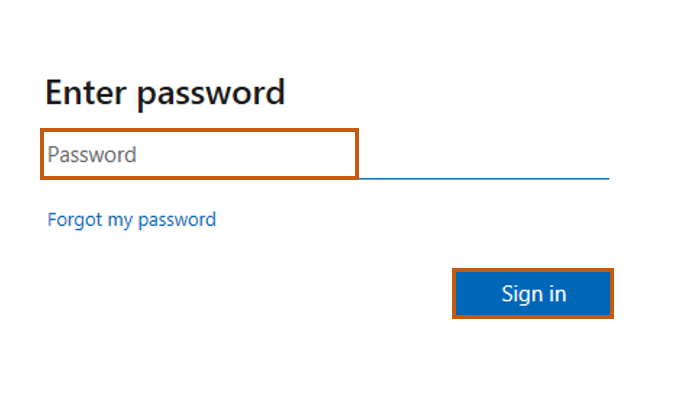
Step 3: Enter credentials of user with Global Admin permissions to Office 365 tenant:
Step 4: Find expression End Date property in the output of the script:
